Sewing Tips
How to Create a Flat-Felled Seam for Durability and a Clean Finish
If you’re a fan of sewing (or just starting to dive into it), learning how to create a flat-felled seam for durability and a clean finish is one of those skills that will instantly up your game. It’s a fantastic technique that not only makes your project look more professional but also adds strength to your seams. Let’s dive into how you can achieve this!
Read More About How to Create a Flat-Felled Seam for Durability and a Clean Finish

Why Choose a Flat-Felled Seam?
When it comes to sewing, we all want our projects to look sharp, right? A flat-felled seam is one of the best ways to get that clean, polished finish you see on store-bought clothes. Plus, it’s incredibly durable. It’s often used in shirts, pants, and jackets—places where strength is key. Imagine the feeling of getting your jeans hemmed, and that beautifully finished seam holds up through all those extra cycles in the washing machine. That’s what a flat-felled seam gives you.
I remember the first time I tried it. I was making a denim jacket, and I was just as excited as I was nervous about tackling this technique. But once I nailed it, I couldn’t believe how good it looked—and how sturdy it felt. It definitely added that “wow” factor to my project.
More Things to Know About How to Create a Flat-Felled Seam for Durability and a Clean Finish

Getting Started: What You’ll Need
Before we get to the step-by-step process of creating a flat-felled seam for durability and a clean finish, let’s go over a few essentials you’ll need for this technique:
- Fabric: A medium-weight fabric works best. Denim or twill is ideal, but cotton works too.
- Thread: Use matching or contrasting thread, depending on the look you want.
- Sewing machine: A standard sewing machine will work just fine for this.
- Iron: Pressing is key, so make sure you have one handy.
And, of course, the biggest tool of all: your creativity! Alright, let’s get started.
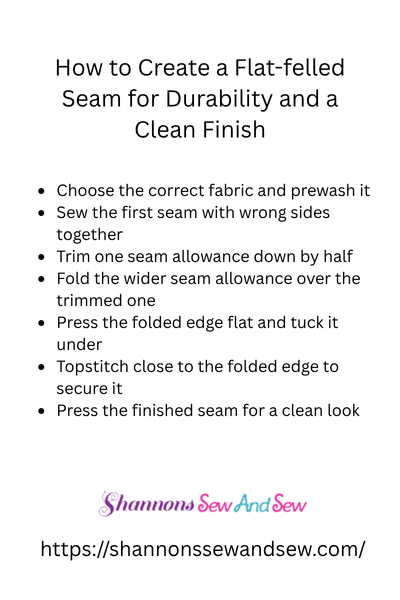
Step 1: Sew the First Seam
Start by sewing your fabric pieces together, but don’t sew all the way to the edge. Leave about a ¼-inch seam allowance. This first seam is where your magic will happen.
Make sure you’re using a standard straight stitch, and sew the pieces right sides together. Take your time with this step—if it’s your first try at a flat-felled seam, the more precise your first seam, the better your final result.
Step 2: Trim One Side of the Seam
Now that you’ve got your seam stitched, it’s time to trim one of the seam allowances. You’ll want to trim one side down to about 1/8 inch. The other side, however, should remain at the full ¼-inch seam allowance.
Why do we do this? Well, the trimmed side will be the one that gets folded over and encases the raw edge of the other piece, hiding it entirely. It’s what gives the flat-felled seam its signature clean, finished look.
Step 3: Fold and Press
Next, fold the longer seam allowance (the one that hasn’t been trimmed) over the trimmed side, so that the raw edge is completely tucked inside. Press it with your iron to create a crisp fold. This step is crucial—get a nice, sharp crease, as this will give you a super clean edge when it’s all finished.
At this point, you might be wondering, “Why am I going to such lengths for a simple seam?” Trust me, it’s worth it! This flat-felled seam won’t fray, and the finish will hold up like a champ over time.
Step 4: Topstitch the Folded Seam
Now comes the fun part: topstitching! Carefully topstitch along the folded edge of the seam. This will secure the fold in place, and that’s what makes the seam durable.
Make sure your stitches are even and straight, as this will affect the overall look of the finished product. You can choose a contrasting thread if you want a bit of visual interest, or stick to matching thread for a more subtle finish.
Once you’re done, give it another press with your iron to set the seam.
Step 5: Admire Your Work!
That’s it! You’ve just created a flat-felled seam for durability and a clean finish. You now have a seam that is not only stronger but looks absolutely professional. You can use this on pretty much any project, whether you’re sewing denim, cotton, or other heavier fabrics.
I remember when I first added a flat-felled seam to a jacket I was making, I was so impressed with how much more polished it looked compared to just regular stitching. It truly elevated the whole project. You’ll feel that same satisfaction too once you’ve mastered this technique.
Why You’ll Love Using Flat-Felled Seams
Aside from the fact that flat-felled seams are strong, they also offer a clean, tidy finish that you can be proud of. They’re fantastic for those projects where durability is key, like workwear or activewear. The best part? It’s a technique you can use on so many projects, from shirts to pants to jackets.
Now, I know it might seem like a lot of work at first, but once you get the hang of it, it’ll feel like second nature. Plus, the result is totally worth it. You’ll be amazed at how much more professional your handmade garments will look—and how they’ll last!
Flat-Felled Seams: The Secret to Durable, Polished Projects
So, there you have it—how to create a flat-felled seam for durability and a clean finish. It’s an easy skill to add to your sewing toolkit that’ll give your projects that “finished” look. I’ve had so much fun using this technique in everything from jackets to pants, and I know you will too. So, go ahead—try it out and let me know how it goes! You’ll be shocked at how quickly you’ll fall in love with flat-felled seams.


