Sewing Clothes
Sewing Smocked Garments: Techniques and Tips
Sewing smocked garments is a fantastic way to bring a bit of vintage charm to your wardrobe, and if you’re anything like me, you’re probably itching to give it a try. Whether you’re creating something for yourself or gifting it to someone else, learning the techniques and tips for smocking will take your sewing projects to the next level. Let’s dive into how you can master this craft and add some personalized flair to your creations.
Read More About Sewing Smocked Garments: Techniques and Tips
What is Smocking and Why Should You Try It?
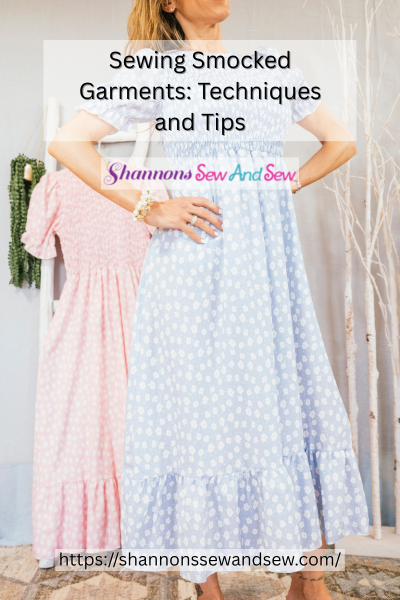
Before we get into the nitty-gritty, let’s quickly touch on what smocking is. Smocking is a decorative stitching technique that gathers fabric in a way that creates beautiful, textured patterns. It’s been used for centuries, and if you’ve ever seen a vintage dress or even some old-school blouses, you’ve probably noticed those delicate, crinkled designs across the fabric.
So, why should you try sewing smocked garments? Well, for one, it’s a creative and rewarding skill. Plus, smocked pieces are timeless. Whether it’s a smocked dress for a special occasion or a simple smocked top to add to your everyday rotation, it’s a surefire way to make something unique and beautiful.
More Things to Know About Sewing Smocked Garments: Techniques and Tips
The Basics of Smocking: Getting Started
Now that you know why smocking is so cool, let’s talk about how to actually do it. Here’s the thing: smocking isn’t as complicated as it might seem at first. Once you get the hang of the basic technique, you’ll be smocking like a pro in no time.
You’ll need a few tools to get started. First, grab your fabric, preferably lightweight cotton, as it’s easier to manipulate. Then, gather some embroidery floss or lightweight thread. Oh, and don’t forget your needles and some tracing tools to map out your design. A thimble might also be handy, especially when you’re pulling tight stitches!
Pro Tip: Before starting on your actual garment, try your hand at some practice swatches. It’s the best way to get a feel for how the fabric behaves with the gathering and smocking stitches.
Smocking Techniques: A Step-by-Step Guide
Alright, let’s break this down so it’s easy to follow. There are a few different methods for creating smocking patterns, but the most common is the “direct smocking” technique. This involves gathering the fabric as you sew the decorative stitches.
- Mark Your Fabric
Use a fabric marking tool to draw out your smocking pattern. You can create any design, but the classic geometric and floral patterns are always popular. The spacing of your marks will determine the size and frequency of your gathers, so take your time with this step.
- Prepare Your Thread
Now, thread your needle with embroidery floss or a matching thread. You’ll want to work with a slightly thicker thread to get that classic smocked texture, but not so thick that it’s difficult to manage.
- Begin the Smocking Stitch
Start by sewing small running stitches across your marked lines. Once you finish each line, pull the thread to gather the fabric slightly. Continue this process across the entire section. As you gather, you’ll notice the fabric starts to form those pretty, little puckers.
- Add the Decorative Stitches
Once your fabric is gathered, go back and add the decorative stitches to secure the gathers in place. These stitches could be anything from simple straight stitches to more intricate patterns like the diamond or zigzag shapes that are commonly seen in smocking.
Pro Tip: Don’t be afraid to experiment with different stitch styles. It’ll add depth and variety to your design, and you’ll find that certain patterns work better with specific fabrics.
Adjusting Your Smocking: Customization Tips
Here’s the best part: smocking is super customizable. If you want to adjust the fit of your garment, you can control how much or how little you gather the fabric. The more gathers you have, the tighter and more fitted your piece will be, and vice versa. If you’re unsure about how tight to make the gathers, start loose and adjust as you go. You can always tighten it up later.
Another thing to keep in mind is the length of your stitches. Longer stitches give the fabric more freedom to flow, while shorter stitches create a firmer, more structured look. Play around with this based on the style of garment you’re working on.
My Smocking Story: How I Fell in Love with the Technique
When I first tried my hand at sewing smocked garments, I had no idea what I was doing. It was a bit of a disaster at first—let’s just say, the fabric was more puckered than I intended! But once I got the hang of it, I was hooked. I made a cute little smocked blouse, and I was so proud of myself. It was nothing fancy, just a simple design, but the fact that I had learned a new technique and brought it to life made it feel like I had accomplished something big.
Smocking isn’t just a way to make beautiful garments—it’s also incredibly satisfying. Plus, every time I wear one of my smocked pieces, I can’t help but smile and think, “I made that!”
Final Thoughts: Sewing Smocked Garments is Totally Worth It
So, there you have it! Sewing smocked garments is a fun, rewarding skill that can bring a whole new level of creativity to your sewing projects. Whether you’re looking to make a statement with a smocked dress or simply add some charm to a shirt or blouse, the possibilities are endless.
Don’t be afraid to experiment and find your style. Smocking doesn’t have to be perfect, but with a little practice and patience, you’ll be making gorgeous pieces that will stand the test of time. Happy sewing, and I can’t wait to see what you create!
Smocking Garments: A Creative Way to Express Your Style
By now, you’re probably thinking about all the smocked garments you could make! From simple tops to stunning dresses, smocking is an easy way to elevate your sewing game and make something truly special.

Beginners Guide to Setting Up Your Sewing Machine

How to Sew a Drawstring Bag: Beginner Project

How to Sew a Shirred Garment with Elastic Thread

Sewing Smocked Garments: Techniques and Tips

How to Sew a Basic Fabric Coaster for Beginners

Sewing Tunic Tops and Dresses: Styles and Patterns

Sewing Pleated Garments: Techniques and Styles

How to Sew a Peplum Top or Dress

Sewing Formal Wear: Gowns, Tuxedos, and Suits

Sewing Basics for Men’s Clothing: Shirts, Pants, and Jackets

Sewing with Lace: Techniques for Clean and Elegant Finishes

How to Sew a Professional Waistband on Skirts and Pants

Sewing Winter Accessories: Hats, Gloves, and Scarves

Sewing with Sheer and Lightweight Fabrics

Sewing Sustainable Fashion: Upcycling and Repurposing Textiles

Sewing Vintage-Inspired Clothing: Patterns and Techniques

Sewing Costumes for Cosplay, Theater, and Special Events

Sewing Adaptive and Inclusive Clothing for Various Needs

Sewing Children’s Clothing: Patterns, Sizing, and Tips
