Sewing Projects
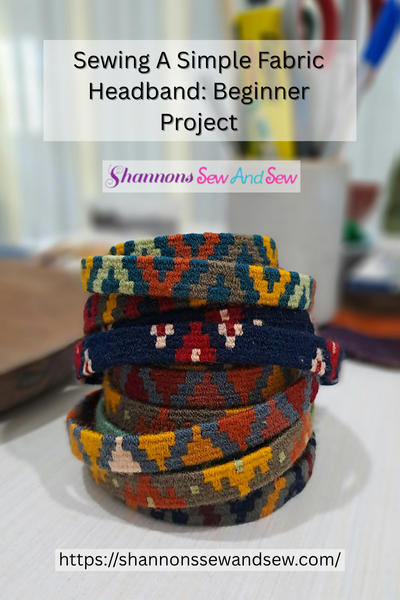
Sewing a Simple Fabric Headband: A Beginner’s Project
Have you ever wanted to try sewing something that’s quick, fun, and useful, but also easy enough for a beginner? Well, let me tell you, sewing a simple fabric headband is the perfect project to start with! Whether you’re looking to make a cute accessory for yourself or as a gift for someone else, this headband project is beginner-friendly and satisfying. You don’t need a lot of experience, just a little bit of fabric, a sewing machine (or needle and thread if you prefer hand-sewing), and a bit of time to spare. So, grab your materials, and let’s dive in!
Read More About Sewing a Simple Fabric Headband: A Beginner’s Project
Why Sew a Fabric Headband?
I remember the first time I decided to make a fabric headband. It was one of those “I bet I can do this!” moments. I’d just started learning to sew, and I thought, “Why not make something practical for myself?” The idea of wearing something I made myself was so exciting! Plus, it was a great way to practice basic sewing skills like straight stitching and working with elastic, both of which come in handy for a ton of other projects.
The beauty of sewing a simple fabric headband is that it’s one of those projects that you can complete in an afternoon. And, if you’re someone who gets easily distracted by unfinished projects (guilty as charged), this is perfect because the headband comes together quickly.
More Things to Know About Sewing a Simple Fabric Headband: A Beginner’s Project
Materials You’ll Need
Before we start, let’s gather our materials. You don’t need anything fancy—just the basics!
- Fabric: A small piece of fabric (about 12 inches by 4 inches) will do. Cotton fabric works best, but feel free to experiment with stretchy or patterned fabrics.
- Elastic: A one inch wide piece of elastic that’s long enough to fit around your head.
- Sewing machine (or needle and thread if hand-sewing): Either will work, but a machine speeds things up!
- Pins or fabric clips: These are for holding everything in place while you sew.
- Scissors: To cut the fabric and elastic.
That’s it! Easy peasy, right?
Step 1: Cut the Fabric and Elastic
First things first, let’s cut the fabric. You’ll want to measure a piece that’s around 12 inches long and 4 inches wide, but feel free to adjust the length if you want a wider or narrower headband. For the elastic, measure a piece that’s about 8-9 inches (this will depend on your head size). Don’t worry if it’s not perfect, the beauty of sewing is that you can always adjust.
Step 2: Sew the Fabric into a Tube
Now, fold your fabric in half lengthwise, right sides together, so it forms a tube. Pin the edges in place and sew along the edge, leaving a small seam allowance. This will be the basic structure of your headband. Be sure to backstitch at both ends to secure the fabric.
At this point, I have to admit, I made my first headband a bit too tight, so it was more of a “headband of doom” than a cute accessory. So, make sure to double-check the size before you sew! After sewing, turn your fabric tube right side out, and give it a little press with an iron if you have one.
Step 3: Attach the Elastic
Now comes the fun part: adding the elastic. Slide your elastic through the fabric tube, pulling it through until the ends meet. Pin the elastic to both ends of the fabric tube. Next, sew the ends of the fabric together to hold the elastic in place. You can sew a small seam across each end, making sure the elastic is secure and the fabric is nicely gathered.
Step 4: Final Touches
Once the elastic is sewn in, give your new headband a try! How does it fit? If it feels too tight, don’t be afraid to adjust the elastic slightly. If it’s too loose, you can always sew a little more to tighten it up.
Now, your simple fabric headband is all set! You’ve just completed a super easy and stylish accessory. Doesn’t it feel great to make something you can actually use?
Why You Should Try It Too
I know, it sounds like a pretty simple project, but trust me, there’s something rewarding about finishing something like this. Plus, you can totally personalize it to match your style. Want a floral print for a touch of vintage? Go for it! Or maybe a solid color for a sleek look? You’ve got it.
As you get more comfortable with sewing a simple fabric headband, you might even start experimenting with different techniques. Try adding embellishments like beads, buttons, or even a bow for a fun twist.
Your First Fabric Headband Is Just the Beginning of Your Sewing Journey
I promise, if I can do it, you can too! The best part about sewing a simple fabric headband is that it’s a low-pressure way to get started with sewing. You don’t need a ton of experience or fancy equipment to create something that’s both fun and functional.
So, what are you waiting for? Grab that fabric, thread your needle (or set up your sewing machine), and get to work on your first headband. You’ll be wearing your handmade creation in no time!

Beginners Guide to Setting Up Your Sewing Machine

How to Sew a Drawstring Bag: Beginner Project

How to Sew a Shirred Garment with Elastic Thread

Sewing Smocked Garments: Techniques and Tips

How to Sew a Basic Fabric Coaster for Beginners

Sewing Tunic Tops and Dresses: Styles and Patterns

Sewing Pleated Garments: Techniques and Styles

How to Sew a Peplum Top or Dress

Sewing Formal Wear: Gowns, Tuxedos, and Suits

Sewing Basics for Men’s Clothing: Shirts, Pants, and Jackets

Sewing with Lace: Techniques for Clean and Elegant Finishes

How to Sew a Professional Waistband on Skirts and Pants

Sewing Winter Accessories: Hats, Gloves, and Scarves

Sewing with Sheer and Lightweight Fabrics

Sewing Sustainable Fashion: Upcycling and Repurposing Textiles

Sewing Vintage-Inspired Clothing: Patterns and Techniques

Sewing Costumes for Cosplay, Theater, and Special Events

Sewing Adaptive and Inclusive Clothing for Various Needs

Sewing Children’s Clothing: Patterns, Sizing, and Tips
