Sewing For Beginners
Important Beginner Sewing Tips Every New Stitcher Should Know
Picture this: You’ve got a brand-new sewing machine, a pile of gorgeous fabric, and a head full of ideas.
But the second you try to sew a straight line, the thread knots up, the fabric won’t feed, and suddenly, you’re questioning all your life choices. Sound familiar?
Sewing can feel overwhelming at first, but every seasoned sewist has been where you are. The secret? A few beginner-friendly tips that will save you from frustration and get you stitching with confidence. Let’s get started…
What You Might Need
Before we get started, here are a few essentials every beginner sewist should have:
- A reliable sewing machine (check your manual—seriously, it’s your best friend)
- Sharp fabric scissors (never use them on paper unless you want a dull, useless pair)
- A seam ripper (because mistakes happen, and that’s okay!)
- Measuring tape and pins (for accuracy and keeping fabric in place)
- Good quality thread (cheap thread breaks, tangles, and makes sewing a nightmare)
Got your supplies? Great! Now let’s get to the fun part—learning the tips that will make sewing so much easier.
1. Meet Your Sewing Machine (It’s Not as Scary as It Looks!)
Your sewing machine is your best tool, but only if you know how to use it.
Every machine has the same basic parts: a presser foot, feed dogs, bobbin winder, and tension dial. Take a few minutes to find these on your machine and get familiar with them.
Start with a practice run on a scrap piece of fabric. Try different stitch lengths and speeds to see how your machine responds.
And whatever you do—read your manual! It’ll save you so much frustration.
Picture This
You’re sitting at your sewing table, hands confidently guiding the fabric as your machine hums along smoothly.
No tangles, no confusion—just you, creating something amazing. Sounds good, right? Taking the time to understand your machine gets you there faster.
2. Always Test on Scrap Fabric
Before sewing that gorgeous fabric you just bought, test everything on a scrap first. This lets you check:
- Tension settings (so your stitches aren’t too tight or loose)
- Stitch length (longer for gathering, shorter for fine details)
- How the fabric feeds through the machine
This tiny step can save you from ruining your actual project. Trust me, you’ll thank yourself later.
Picture This
You’re about to sew the final seam on your handmade tote bag when—uh oh—the thread tension is off, and your stitches look awful. If only you had tested on scrap fabric first.
3. Pin (or Clip) Everything
Straight seams don’t happen by accident—they happen because you pin or clip your fabric before sewing.
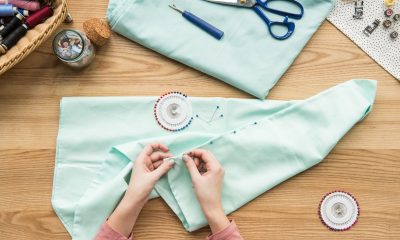
Place your pins perpendicular to the edge, so they’re easy to remove as you sew. If you’re working with thick fabric or just hate pins, try fabric clips instead.
Picture This
You’re sewing a straight seam with zero shifting or puckering because your fabric is neatly pinned. The stitches are smooth, the edges are even, and your project looks professional. Effortless, right?
4. Learn the Magic of the Seam Ripper
Let’s be honest—mistakes will happen. That’s where the seam ripper comes in. Instead of getting frustrated, just rip out the mistake and try again. The best part? No one will ever know.
Pro tip: Use the seam ripper’s small red ball to glide along the seam without tearing the fabric. It’s a game-changer.
Picture This
You sewed the wrong pieces together, but instead of panicking, you grab your seam ripper, fix the mistake, and move on. No stress, no problem!
5. Master the Basic Stitches First
Forget fancy embroidery stitches for now. Focus on these basics:
- Straight stitch – Used for almost everything (seams, hems, topstitching)
- Zigzag stitch – Great for finishing raw edges and sewing stretchy fabric
- Backstitch – Secures your stitches at the beginning and end of seams
Once you’ve got these down, you can start experimenting with more decorative stitches.
Picture This
You confidently sew a straight seam, backstitch at the end, and admire your perfectly finished edge. It’s the foundation of everything you’ll sew from here on out.
6. Press as You Sew
Want your projects to look neat and professional? Iron your seams as you go.
Pressing helps fabric lay flat, making it easier to sew straight seams. A simple press can take your sewing from “homemade” to handmade perfection.
Picture This
You finish a project, and it looks just like the inspiration photo—smooth seams, crisp edges, and not a wrinkle in sight. Pressing really does make all the difference.
7. Choose the Right Needle for the Job
Not all sewing needles are created equal. Using the wrong needle can cause skipped stitches, uneven seams, or even fabric damage. Here’s a quick guide:
- Universal needles – Work for most woven fabrics
- Ballpoint needles – Best for stretchy knit fabrics
- Denim needles – Designed for thick fabrics like jeans
- Microtex needles – Perfect for delicate fabrics like silk
Picture This
No more broken needles or frustrating skipped stitches—just smooth, even sewing because you used the right needle.
8. Don’t Rush—Slow and Steady Wins the Race
It’s tempting to sew as fast as your machine allows, but going slow gives you more control. If your fabric shifts or puckers, take a deep breath, slow down, and adjust as needed.
Picture This
Instead of racing through a project and making mistakes, you sew carefully, making each stitch count. The result? A project you’re proud to show off.
9. Keep Your Machine Happy (AKA Maintenance Matters!)
Your sewing machine works hard—give it some love. Regularly:
- Change the needle (a dull needle = skipped stitches)
- Clean out lint and dust (especially around the bobbin area)
- Oil it if needed (check your manual for instructions)
A well-maintained machine will sew better and last longer.
Picture This
You sit down to sew, and your machine purrs like a kitten—no strange noises, no thread tangles, just smooth stitching. That’s the power of good maintenance.
10. Enjoy the Process!
Sewing is supposed to be fun, so don’t stress over little mistakes. Every project teaches you something new, and the more you sew, the better you’ll get.
Picture This
You finish your first handmade project, imperfections and all, and feel so proud. You’re officially a sewist, and this is just the beginning of your creative journey.
Ready to Start Sewing?
With these beginner tips, you’re set up for success. Take it one step at a time, practice on scrap fabric, and most importantly—have fun with it.
What’s the first project you’re excited to try?


