Sewing Safety
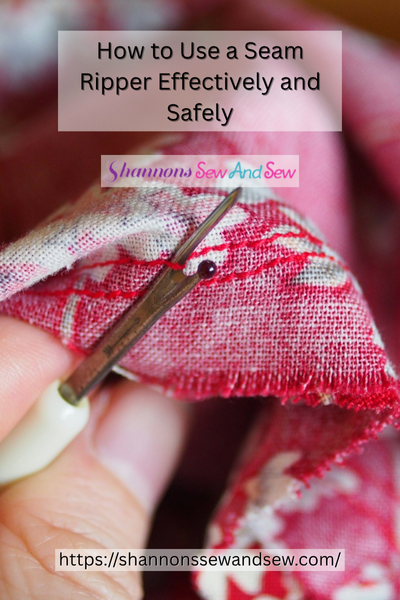
How to Use a Seam Ripper Effectively and Safely
So you’ve found yourself staring down a seam that needs fixing, and you’re wondering how to use a seam ripper effectively and safely. Trust me, I’ve been there. Nothing feels more annoying than putting time and love into a sewing project, only to realize you’ve stitched the sleeve to the pant leg (yep, I’ve done that). But here’s the good news—your seam ripper is your trusty little undo button. You just have to know how to use it without tearing your fabric… or your patience.
Read More About How to Use a Seam Ripper Effectively and Safely
My First Seam Ripper Drama
Let me take you back to one of my early sewing fiascos. I was working on a shirt for my brother, trying to impress him with my “skills.” It looked great… until I realized I’d sewn the collar inside out. No biggie, right? Well, I grabbed my seam ripper, went at it like I was opening a birthday present, and—you guessed it—ripped a hole straight through the fabric. Cue the dramatic sigh.
That’s when I realized that knowing how to use a seam ripper effectively and safely is just as important as knowing how to thread your machine.
More Things to Know About How to Use a Seam Ripper Effectively and Safely
Let’s Talk About the Tool
Your seam ripper has two ends: a pointy end that’s sharp (kind of like a little dagger) and a curved blade in the middle. One prong is usually longer than the other—the shorter one has that tiny red ball on the tip. That red ball? It’s there to help protect your fabric from getting sliced. Not just for decoration, who knew?
So, when you’re using it, you’ve got two choices: go slow and methodical by picking each stitch one at a time, or go the “zipper” route and glide the blade through multiple stitches in one swoop. The trick is knowing when to use which.
How to Use a Seam Ripper Effectively and Safely (Without a Fabric Funeral)
If you’re unpicking topstitching or delicate seams, go slow. You can gently slide the pointy end under every few stitches and lift them out. It’s a little tedious, but you’ll save the fabric and avoid accidents.
For sturdier fabric or longer seams, you can slide the red ball under the stitch, push the ripper along the seam line, and let the blade do the work. But (and this is a big but), make sure you’re slicing only the thread—not the fabric underneath. I always keep a finger behind the seam to feel if it’s getting too tight or starting to bunch up.
And please, whatever you do, don’t try to rip through everything in one go. That’s how shirts become rags.
The Secret Is in the Angle
Here’s something I learned after ruining more than a few seams: angle matters. Hold your seam ripper like a pencil. You want to feel like you’re gently teasing the stitch open, not attacking it. Keep the sharp edge facing the thread, and guide it with your dominant hand while the other hand holds the fabric steady. It’s like slicing butter—but with a little more precision and a lot less mess.
Also, good lighting helps. I mean, if you’re working on black thread on black fabric in a dim room, you’re asking for trouble. Grab a lamp or use one of those fun magnifying glasses with a light—no shame in that game.
When Things Get Messy
Sometimes you’ll hit a tangle. A knot, a backstitch, or one of those mystery threads that seems to go on forever. Don’t panic. Stop and regroup. You can gently pull the seam apart to expose more stitches, and then keep going. If the thread breaks into tiny fluff-balls (we’ve all seen that happen), use some sticky tape or a lint roller to clean it up before you stitch again.
Quick Fixes After the Rip
Once you’ve unpicked the seam, check the fabric. Are there tiny holes or stretched spots? Give it a gentle press with an iron (low heat, please!) to help it recover before re-stitching. If the fabric looks weak, reinforce the area with some interfacing or a patch. It’s better to be safe than sorry—especially if you’re working on something you actually want to wear in public.
Your Seam Ripper Is Your Secret Weapon
Look, none of us want to use a seam ripper. It’s not the most glamorous part of sewing. But knowing how to use a seam ripper effectively and safely turns it from a tool of frustration into a secret weapon. It can save your project, your time, and sometimes your sanity.
I’ve learned to see my seam ripper as a little buddy who helps me fix the things I mess up—and believe me, I mess up a lot. So don’t fear it. Learn to handle it with confidence, and you’ll find your sewing projects look better and last longer. Plus, it’s oddly satisfying when you master the “rip and redo” routine.
Now it’s your turn—next time your seams go rogue, grab your seam ripper like the boss you are and make it right. Just maybe avoid the collar incident, okay?

Beginners Guide to Setting Up Your Sewing Machine

How to Sew a Drawstring Bag: Beginner Project

How to Sew a Shirred Garment with Elastic Thread

Sewing Smocked Garments: Techniques and Tips

How to Sew a Basic Fabric Coaster for Beginners

Sewing Tunic Tops and Dresses: Styles and Patterns

Sewing Pleated Garments: Techniques and Styles

How to Sew a Peplum Top or Dress

Sewing Formal Wear: Gowns, Tuxedos, and Suits

Sewing Basics for Men’s Clothing: Shirts, Pants, and Jackets

Sewing with Lace: Techniques for Clean and Elegant Finishes

How to Sew a Professional Waistband on Skirts and Pants

Sewing Winter Accessories: Hats, Gloves, and Scarves

Sewing with Sheer and Lightweight Fabrics

Sewing Sustainable Fashion: Upcycling and Repurposing Textiles

Sewing Vintage-Inspired Clothing: Patterns and Techniques

Sewing Costumes for Cosplay, Theater, and Special Events

Sewing Adaptive and Inclusive Clothing for Various Needs

Sewing Children’s Clothing: Patterns, Sizing, and Tips
