Sewing Tips
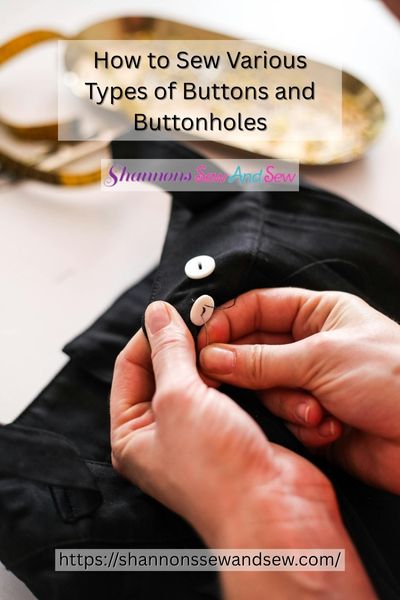
How to Sew Various Types of Buttons and Buttonholes
Ever had a favorite shirt lose a button at the worst possible time? Or maybe you’ve wanted to add a professional touch to your handmade garments but felt unsure about sewing buttonholes? Don’t worry—you’re not alone! Learning how to sew various types of buttons and buttonholes is a skill that’ll save you from fashion mishaps and elevate your sewing game.
Read More About How to Sew Various Types of Buttons and Buttonholes
Getting Started: Tools You Need
Before we dive into the stitches, let’s talk tools. You don’t need a fancy sewing machine (though it helps), but you will need:
- A needle (or a sewing machine with a buttonhole foot)
- Thread (match it to your fabric for a seamless look)
- Scissors
- A marking tool (chalk or a fabric pen)
- A seam ripper (just in case)
Got everything? Great! Let’s get stitching.
More Things to Know About How to Sew Various Types of Buttons and Buttonholes
Sewing Different Types of Buttons
1. Flat Buttons
These are the most common buttons you’ll find on shirts and pants. They have either two or four holes.
- Thread your needle and tie a knot at the end.
- Place the button over the marked spot on your fabric.
- Push the needle up through one hole and down through the opposite hole (if it’s a two-hole button) or diagonally (if it’s a four-hole button).
- Repeat this about six times for strength.
- On the last pass, wrap the thread under the button to create a shank (a little space between the button and fabric), then knot and snip the thread.
2. Shank Buttons
Shank buttons have a small loop on the back instead of holes. That loop makes them perfect for thicker fabrics like coats.
- Start with a strong, double-threaded needle.
- Bring the needle up through the fabric where the button will sit.
- Pass the thread through the shank and back down into the fabric.
- Repeat about five or six times.
- Secure the thread with a knot on the back.
3. Snap Buttons
These are fantastic for kids’ clothes, bags, and jackets. They come in two parts: the socket and the stud.
- Mark the placement of each snap half.
- Sew one half of the snap onto the fabric using small whip stitches.
- Align the other half and repeat the stitching process.
- Snap them together, and you’re done!
Mastering Buttonholes
A button is only as useful as its buttonhole. Let’s go over a few ways to sew them.
1. Machine-Sewn Buttonholes
Most modern sewing machines have an automatic buttonhole function. If yours does, congratulations! It’s a game-changer. Just place your button in the foot attachment, select the buttonhole stitch, and let the machine do its magic.
If you’re going manual:
- Mark the buttonhole placement.
- Set your machine to a narrow zigzag stitch.
- Sew down one side, pivot, sew across the bottom, pivot again, and stitch up the other side.
- Use a seam ripper to carefully open the hole.
2. Hand-Sewn Buttonholes
This takes patience, but the results are beautiful and sturdy.
- Mark and cut a small slit where your buttonhole will be.
- Use a blanket stitch around the edges to prevent fraying.
- Make sure your stitches are close together for a neat finish.
3. Bound Buttonholes
These are more advanced but look super professional, especially on blazers and coats.
- Cut a fabric strip slightly larger than your buttonhole.
- Stitch it around the opening, then turn it inside out to hide the raw edges.
- Secure with small, hidden stitches.
A Personal Sewing Mishap (And What I Learned!)
I’ll never forget the time I tried sewing a buttonhole for the first time. I didn’t mark the placement properly, and when I cut it open—boom! It was way too big. My button slipped right through like a kid on a water slide. Lesson learned: Always measure twice, cut once, and practice on scrap fabric first.
Finishing Touches
Once you’ve mastered how to sew various types of buttons and buttonholes, your handmade projects will look polished and professional. Plus, you’ll never panic over a missing button again. Whether you’re fixing up your wardrobe or crafting something from scratch, this skill will serve you well.
What will you sew next? A crisp dress shirt? A cozy cardigan? Whatever it is, you’re now equipped to handle any button situation like a pro. Happy sewing.

Beginners Guide to Setting Up Your Sewing Machine

How to Sew a Drawstring Bag: Beginner Project

How to Sew a Shirred Garment with Elastic Thread

Sewing Smocked Garments: Techniques and Tips

How to Sew a Basic Fabric Coaster for Beginners

Sewing Tunic Tops and Dresses: Styles and Patterns

Sewing Pleated Garments: Techniques and Styles

How to Sew a Peplum Top or Dress

Sewing Formal Wear: Gowns, Tuxedos, and Suits

Sewing Basics for Men’s Clothing: Shirts, Pants, and Jackets

Sewing with Lace: Techniques for Clean and Elegant Finishes

How to Sew a Professional Waistband on Skirts and Pants

Sewing Winter Accessories: Hats, Gloves, and Scarves

Sewing with Sheer and Lightweight Fabrics

Sewing Sustainable Fashion: Upcycling and Repurposing Textiles

Sewing Vintage-Inspired Clothing: Patterns and Techniques

Sewing Costumes for Cosplay, Theater, and Special Events

Sewing Adaptive and Inclusive Clothing for Various Needs

Sewing Children’s Clothing: Patterns, Sizing, and Tips
