Sewing Clothes
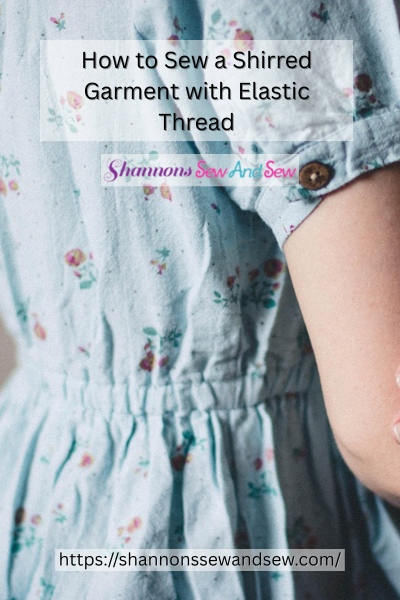
How to Sew a Shirred Garment with Elastic Thread
Have you ever come across those cute, shirred dresses or tops that look like they were made with a magic trick? Well, guess what? That “magic” is actually a simple technique involving elastic thread! If you’ve been wondering how to sew a shirred garment with elastic thread, you’re in for a treat. It’s easier than it sounds, and trust me, you’ll feel like a sewing pro once you nail it.
I remember the first time I tried shirring. I was attempting to make a flowy summer dress, and I thought, “How hard can it be?” I was surprised by how quickly I caught on. In no time, I had this gorgeous, fitted top with a bit of stretch that felt like it was custom-made just for me. It was love at first stitch, and I can’t wait to share how you can get the same results.
Read More About How to Sew a Shirred Garment with Elastic Thread
What is Shirring?
Before we dive into the how-to, let me quickly explain what shirring is. It’s a technique where you use elastic thread in the bobbin to create gathered fabric. This adds stretch and shape to your garment, perfect for making dresses, skirts, or even waistbands that are both comfy and stylish.
You can achieve shirring by simply sewing parallel lines of straight stitching. The elastic thread pulls the fabric together as you sew, creating those beautiful, soft gathers that give garments a relaxed yet fitted look.
More Things to Know About How to Sew a Shirred Garment with Elastic Thread
Getting Started: What You’ll Need
You don’t need a ton of fancy equipment to get started with shirring. Here’s what you’ll need to make your own shirred garment with elastic thread:
- Elastic Thread (you can find this in most fabric stores)
- Cotton Thread for your machine’s top thread (since you’ll use the elastic thread in the bobbin)
- Sewing Machine (no need for a fancy one—any basic machine will do)
- Fabric (light to medium weight fabrics work best)
- Scissors and Pins for marking your fabric
Got everything? Great! Let’s jump into the good stuff.
Step 1: Thread Your Sewing Machine
Here’s where the magic starts. The key to shirring is in the bobbin, so let’s begin by winding the elastic thread onto the bobbin. Don’t stretch the thread while winding it—just wind it loosely. Then, place the bobbin into the machine, and set your top thread to a regular cotton thread. Make sure the tension is set correctly. If you’re unsure, start at a medium setting and test on a scrap piece of fabric first.
Step 2: Preparing Your Fabric
Before you start sewing, it’s important to prepare your fabric. Lay it flat, and then decide where you want the shirring to go. Do you want a gathered waistline or maybe shirred sleeves? Mark your stitching lines with a fabric chalk or a washable fabric pen. I always like to mark my lines a few inches apart to make sure the gathers are evenly spaced. This will give your garment a smooth, professional look.
Step 3: Start Sewing!
Here comes the fun part: sewing those parallel lines! Start at one end of your fabric, and sew straight lines along the marked lines, using a regular stitch length. You want to sew over the elastic thread, not stretch it. As you sew, you’ll notice the fabric starting to gather under the needle. Keep your pace steady, and don’t pull on the fabric as you go.
Pro tip: I like to go slow at first to make sure the fabric gathers just right. If you’re unsure about the tension or gather, test on a scrap piece first.
Step 4: Adjust the Gathers
Once you’ve sewn all your lines, it’s time to play with those gathers. You can adjust them by gently pulling on the fabric between the rows of stitching. If you’re going for a snug fit, pull a bit more to gather the fabric tightly. If you want it looser, just ease up on the pulls. It’s your garment, so go with what feels right.
Step 5: Finishing Touches
After you’re happy with the gathers, finish off the raw edges of your fabric (I usually use a zigzag stitch or an overlocker). If you’re making a dress, top it off with a cute waistband or hem. You can even add elastic around the shoulders for that relaxed, boho vibe.
The best part about shirring is that the elastic thread allows the fabric to stretch, so you get a perfect fit every time.
My Shirring Success Story
A few months ago, I made a cute sundress for a friend using this technique, and let me tell you, she was so impressed! I used a fun, floral print fabric and added a shirred waistband. She loved how comfortable it was but still gave her that flattering, fitted look. It was one of those “wow” moments where I was like, “Okay, this technique is definitely a keeper!”
I also tried shirring for a men’s summer shirt, and it worked beautifully to give the shirt a little more room without losing its structured look. Shirring isn’t just for women’s clothes—you can easily adapt it for menswear, too! Just think about a casual button-down shirt with a bit of stretch across the back. Super cool, right?
Ready to Sew a Shirred Garment?
Now that you know how to sew a shirred garment with elastic thread, it’s time to put your skills to the test. Whether you’re making a dress, a top, or even some comfy shorts, this technique is easy to learn and incredibly rewarding. So, grab your fabric, load that elastic thread, and start stitching.
By the way, I’d love to hear about your shirring projects! What are you making first? Maybe a summer dress? Let me know how it turns out. Happy sewing!
Tips for Successful Shirring
- Test first: Always do a quick test on a scrap fabric to make sure your tension and gathers are perfect.
- Don’t stretch the thread too much: Let the elastic thread work its magic without pulling too tightly.
- Use light fabrics: Shirring works best on fabrics that have a little drape to them—like cotton, rayon, or voile.
Now, get to sewing your new favorite shirred garment.

Beginners Guide to Setting Up Your Sewing Machine

How to Sew a Drawstring Bag: Beginner Project

How to Sew a Shirred Garment with Elastic Thread

Sewing Smocked Garments: Techniques and Tips

How to Sew a Basic Fabric Coaster for Beginners

Sewing Tunic Tops and Dresses: Styles and Patterns

Sewing Pleated Garments: Techniques and Styles

How to Sew a Peplum Top or Dress

Sewing Formal Wear: Gowns, Tuxedos, and Suits

Sewing Basics for Men’s Clothing: Shirts, Pants, and Jackets

Sewing with Lace: Techniques for Clean and Elegant Finishes

How to Sew a Professional Waistband on Skirts and Pants

Sewing Winter Accessories: Hats, Gloves, and Scarves

Sewing with Sheer and Lightweight Fabrics

Sewing Sustainable Fashion: Upcycling and Repurposing Textiles

Sewing Vintage-Inspired Clothing: Patterns and Techniques

Sewing Costumes for Cosplay, Theater, and Special Events

Sewing Adaptive and Inclusive Clothing for Various Needs

Sewing Children’s Clothing: Patterns, Sizing, and Tips
