Sewing Clothes
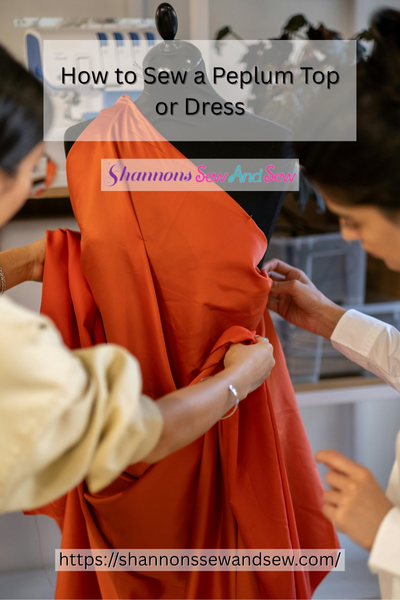
How to Sew a Peplum Top or Dress
Sewing a peplum top or dress can feel like a bit of a challenge, but trust me, it’s easier than you might think. If you’ve ever wanted to add a touch of flare to your wardrobe, a peplum is a perfect way to do it! In this post, I’m going to show you how to sew a peplum top or dress, step by step, with some personal insights along the way. You’ll be amazed at how this stylish and flattering silhouette can come together.
Read More About How to Sew a Peplum Top or Dress
What Exactly Is a Peplum?
Before we dive into the sewing details, let’s talk about what a peplum actually is. The peplum is that cute little flare of fabric that sits at the waist, creating a flattering, hourglass shape. It’s been a favorite in fashion for years, and honestly, it’s one of those classic designs that never really goes out of style. Whether you’re making a top or a dress, the peplum can make your outfit pop without too much effort.
I remember the first time I tried making a peplum dress—it was a total experiment. I was kind of nervous, but the process ended up being so much fun! And the best part? It turned out to be super flattering, and I got tons of compliments.
More Things to Know About How to Sew a Peplum Top or Dress
Materials You’ll Need to Sew a Peplum Top or Dress
Before you get started, it’s essential to gather your supplies. Don’t worry, nothing too fancy or difficult. Here’s what you’ll need:
- Fabric: Choose a fabric that has some structure, like cotton, linen, or a polyester blend. It’ll give your peplum that nice flare.
- Sewing machine: A basic sewing machine will do the trick!
- Thread: Pick a color that matches your fabric.
- Pins: To hold everything in place while you sew.
- Scissors: For cutting your fabric pieces.
- Pattern: You can use a store-bought pattern or make your own! I always love playing around with patterns to get the perfect fit.
Once you’ve got your materials ready, it’s time to get down to business.
Cutting Your Fabric: The First Step to a Perfect Peplum
Now, let’s talk about cutting your fabric. When you’re cutting out the pieces for your peplum top or dress, make sure you have your pattern ready. If you’re using a store-bought pattern, follow the cutting instructions carefully. If you’re creating your own, don’t worry—it’s a simple process.
Start by cutting your bodice and peplum pieces. The peplum should be cut as a circle (or half-circle, depending on your pattern). Don’t stress about making it perfect right away—just focus on getting your cuts as clean and straight as possible.
A little personal tip here: If you’re not sure how much flare to give the peplum, I like to add a couple of inches to the bottom of the pattern piece for a fuller, flirty look. But if you prefer something more subtle, keep it a little smaller. It’s all about what makes you feel comfortable.
Assembling Your Peplum Top or Dress
Once your pieces are cut out, you’re ready to start assembling. This part is pretty straightforward, so let’s break it down:
- Sew the Bodice: First, sew the pieces for the bodice together. You’ll typically sew the side seams, then attach the front and back panels. Make sure to pin everything before you sew, so nothing shifts.
- Sew the Peplum: Now, the fun part! Attach the peplum to the bottom of the bodice. If you want the peplum to have a bit of a “poof,” you can add a little gathering stitch to the top edge of the peplum and pull it to fit the bodice. This gives it a little extra volume.
- Finishing Touches: Once the peplum is attached, you can finish the edges with a serger or zigzag stitch to prevent fraying. Hem the bottom of the peplum to your desired length, and you’re almost done.
Fitting and Adjusting
Here’s where things can get a little tricky—but don’t worry! Fitting your top or dress is one of the most rewarding parts of sewing. Once your garment is mostly put together, try it on and make any adjustments as needed. If the bodice feels too tight or too loose, take it in or let it out accordingly. A well-fitted bodice can make all the difference in how your peplum top or dress looks.
It’s also important to check the length of the peplum. If it’s too long, you can easily shorten it to suit your body type and preferences. And remember, peplums can look great at different lengths, so don’t be afraid to experiment a little!
The Final Touch: Rock Your Peplum Creation!
Once you’ve finished sewing your peplum top or dress, it’s time to show it off! Whether you’re wearing it to a casual outing, a dinner date, or a special event, you’re going to feel amazing. There’s something so satisfying about making your own clothes, especially when you see how great it looks on you.
Personally, I always get a little excited when I wear something I’ve sewn myself. It’s like a little secret confidence boost. So, take a moment to admire your handiwork—seriously, you’ve earned it.
Peplum Goals Achieved One Stitch at a Time
Sewing a peplum top or dress might seem intimidating at first, but with a little patience and creativity, you can easily create something stylish and fun. Whether you’re a seasoned pro or a beginner, I promise the end result is worth the effort. So grab your fabric, thread, and sewing machine, and let’s make something beautiful. You’ll be rocking your custom peplum in no time.
I hope this guide helps you feel more confident about tackling your next project. Let me know how it goes—I’d love to hear how your peplum top or dress turns out.

Beginners Guide to Setting Up Your Sewing Machine

How to Sew a Drawstring Bag: Beginner Project

How to Sew a Shirred Garment with Elastic Thread

Sewing Smocked Garments: Techniques and Tips

How to Sew a Basic Fabric Coaster for Beginners

Sewing Tunic Tops and Dresses: Styles and Patterns

Sewing Pleated Garments: Techniques and Styles

How to Sew a Peplum Top or Dress

Sewing Formal Wear: Gowns, Tuxedos, and Suits

Sewing Basics for Men’s Clothing: Shirts, Pants, and Jackets

Sewing with Lace: Techniques for Clean and Elegant Finishes

How to Sew a Professional Waistband on Skirts and Pants

Sewing Winter Accessories: Hats, Gloves, and Scarves

Sewing with Sheer and Lightweight Fabrics

Sewing Sustainable Fashion: Upcycling and Repurposing Textiles

Sewing Vintage-Inspired Clothing: Patterns and Techniques

Sewing Costumes for Cosplay, Theater, and Special Events

Sewing Adaptive and Inclusive Clothing for Various Needs

Sewing Children’s Clothing: Patterns, Sizing, and Tips
