Sewing Projects
How to Sew a Basic Fabric Coaster for Beginners
If you’ve ever wondered how to sew a basic fabric coaster for beginners, you’re in the right place. Trust me, it’s one of those satisfying little projects that’s quick, practical, and doesn’t require a fancy sewing room or a pile of expensive tools.
Read More About How to Sew a Basic Fabric Coaster for Beginners
Why Coasters? And Why Now?
Let me tell you a quick story—my first ever sewing project wasn’t some glorious quilt or fancy tote bag. Nope, it was a coaster. Just one. It was a little lopsided and had suspiciously uneven stitches, but man, I was so proud of it. I still use that wonky little square on my desk, and every time I plop a mug on it, I think, “Hey, I made that!”
So, if you’re just getting into sewing or dusting off your machine after years, learning how to sew a basic fabric coaster for beginners is the perfect way to warm up those creative muscles.
More Things to Know About How to Sew a Basic Fabric Coaster for Beginners

What You’ll Need (And Probably Already Have)
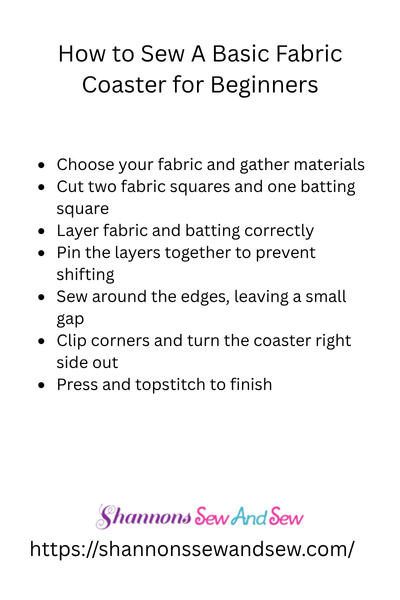
Here’s the best part: you probably already have what you need lying around. A few fabric scraps, some thread, and your machine—that’s about it. You can get fancy with interfacing or batting in the middle for some padding, but honestly? A good ol’ two-layered coaster works just fine.
You’ll need:
- Two 5” x 5” squares of cotton fabric
- Matching thread
- Scissors or rotary cutter
- Pins or clips
- A sewing machine (though you could hand sew if you’re patient)
Let’s Make This Coaster!
Okay, now to the fun part. Sewing! If you’re nervous, don’t be. This is just a fabric sandwich, really. You’re going to stack your fabric squares right sides together (that just means the pretty sides face each other), pin them, and sew around the edges—but leave a small gap for turning it right side out. If you forget the gap, you’ll find out the hard way why that step matters. Ask me how I know.
Once you’ve stitched all the way around (except for that little gap), trim the corners to reduce bulk. Then flip the whole thing inside out. Use something pointy like a chopstick to poke out the corners so they’re nice and crisp. Iron it flat, and then sew around the edge again for a neat finish and to close up the gap. Bam! You’ve just learned how to sew a basic fabric coaster for beginners. Easy, right?
Customize It—Or Don’t
What I love about making coasters is how low-pressure they are. If it turns out crooked, it’s still totally usable. If it’s perfect, awesome—you just leveled up. You can play with different fabrics, themes, or even make a whole matching set as a gift. (Mother’s Day? Housewarming? Your brother’s new apartment that still smells like paint? You get the idea.)
You can also experiment with quilting a little design on top or adding a third layer for thickness. But honestly, don’t stress. You don’t need to start with anything fancy. The goal is to enjoy the process and get to know your machine, not create a masterpiece worthy of a Pinterest showdown.
A Little Tip That Saved My Sanity
Okay, real talk: when I first started sewing, I kept forgetting to backstitch at the beginning and end of my seams. That meant my lovely little coaster would start to come apart after a few uses. Don’t skip that step—it’s like tying a knot in the end of a balloon. Gotta lock it in!
And if your machine is giving you attitude (we all have that one moment where the thread snarls like spaghetti), just take a breath. Re-thread it. Nine times out of ten, it’s a threading issue. I’ve been there. We’ve all been there.
One Coaster at a Time You’re Building Real Sewing Skills
Learning how to sew a basic fabric coaster for beginners is like giving yourself a little creative victory. It’s not just about the coaster (although those are super handy). It’s about getting started. About building confidence. About turning scraps into something useful and even giftable.
And hey, maybe one day you’ll look at that slightly wonky first coaster and smile—just like I do—because that little square was the start of something awesome.
So, what are you waiting for? Go grab those fabric scraps, fire up your machine, and let’s get stitching! And if you make one, tag me—I’d love to see it!

Beginners Guide to Setting Up Your Sewing Machine

How to Sew a Drawstring Bag: Beginner Project

How to Sew a Shirred Garment with Elastic Thread

Sewing Smocked Garments: Techniques and Tips

How to Sew a Basic Fabric Coaster for Beginners

Sewing Tunic Tops and Dresses: Styles and Patterns

Sewing Pleated Garments: Techniques and Styles

How to Sew a Peplum Top or Dress

Sewing Formal Wear: Gowns, Tuxedos, and Suits

Sewing Basics for Men’s Clothing: Shirts, Pants, and Jackets

Sewing with Lace: Techniques for Clean and Elegant Finishes

How to Sew a Professional Waistband on Skirts and Pants

Sewing Winter Accessories: Hats, Gloves, and Scarves

Sewing with Sheer and Lightweight Fabrics

Sewing Sustainable Fashion: Upcycling and Repurposing Textiles

Sewing Vintage-Inspired Clothing: Patterns and Techniques

Sewing Costumes for Cosplay, Theater, and Special Events

Sewing Adaptive and Inclusive Clothing for Various Needs

Sewing Children’s Clothing: Patterns, Sizing, and Tips
