Supplies And Equipment
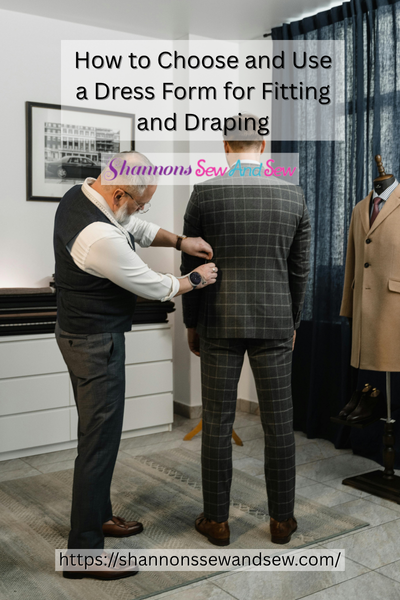
How to Choose and Use a Dress Form for Fitting and Draping
When you’re diving into the world of sewing, there’s one tool that quickly becomes your best friend: the dress form. Knowing how to choose and use a dress form for fitting and draping can seriously level up your sewing game. Whether you’re crafting the perfect custom garment or experimenting with draping techniques, having a dress form that fits your needs makes all the difference. So let’s talk about how you can find the right one for you—and how to make it work wonders!
Read More About How to Choose and Use a Dress Form for Fitting and Draping
Choosing the Right Dress Form for You
Let’s start with the basics. Choosing a dress form isn’t just about picking the most expensive one or the one with the coolest features. It’s about selecting the one that suits your style, your body shape, and, yes, your budget. I remember when I first started sewing, I went a bit overboard, thinking a fancy dress form was the secret to perfect fits. Spoiler alert: It wasn’t. But it did teach me a lot about what works—and what doesn’t.
So, how do you pick the right dress form?
More Things to Know About How to Choose and Use a Dress Form for Fitting and Draping
Size Matters (A Lot)
The first thing you need to think about is size. No two bodies are the same, and the same goes for dress forms. You’ll want one that matches your measurements as closely as possible. If you’re between sizes, go for one that is adjustable—this can give you more flexibility in the long run.
I can’t tell you how many times I’ve had to tweak my form to match a client’s measurements or even my own (yep, I’ve made mistakes with sizing before). Adjustability means you can easily modify the bust, waist, and hip measurements without too much hassle. If your dress form doesn’t fit your body exactly, that’s okay. Just make sure it’s close enough for proper draping and fitting.
Material and Construction
Now, let’s talk about the material of your dress form. Some are covered in a soft, fabric-like material, while others are made of foam or harder plastic. Personally, I prefer a soft fabric cover—it gives a more accurate feeling when I’m working on draping fabric, and I can pin my designs without worrying about damaging the form.
The most popular materials tend to be foam or a hard outer shell with padding. If you’re serious about fitting, you’ll also want to consider a form with a sturdy stand or adjustable height, especially if you’re working on long garments like gowns.
Stand Alone vs. Tabletop Forms
If you’re working in a smaller space or just doing light fitting, a tabletop dress form could be a game-changer. I remember when I first started, I was crammed in a tiny room, and I found a compact tabletop form that made all the difference. It was portable, adjustable, and didn’t take up nearly as much space as a full-size one.
But if you’re working with larger pieces or doing extensive draping, you may want the freedom of a full-sized, standalone form. These can be easier to manipulate and have more space for the larger garments.
How to Use a Dress Form for Fitting and Draping
Okay, so you’ve got your dress form. Now, the real fun begins! Using a dress form for fitting and draping is one of those things that feels like magic once you get the hang of it. But like anything, it takes practice.
Fitting: The Secret to Custom Garments
When you’re fitting a garment, especially if it’s a custom design, it’s all about precision. Here’s my best advice: always pin the garment to the dress form at key points—think along the shoulders, sides, and hemline. I remember when I first started, I was so focused on getting the seams just right that I didn’t pay attention to how the garment was hanging on the form. That’s a mistake I’ll never make again. Once you pin it, step back and evaluate. You want your garment to fit as close to the form as possible.
And don’t forget to check the back! It’s easy to get caught up in the front view, but the back can reveal issues like poor fit or fabric pulling. Also, if you’re working with a pattern, make sure you check how the pattern aligns with your body shape on the form.
Draping: Unleash Your Creativity
Draping is where the magic really happens. This is when you get to experiment with fabric, letting it fall and hang in ways that give your designs that organic, sculpted feel. Here’s my trick: always start with a lightweight fabric when you’re draping. This allows you to see how the fabric moves and hangs on the form before you commit to the heavier stuff.
One of my favorite things to do is drape a piece of fabric, step back, and see how the folds look on the dress form. If I see something I don’t like, I can adjust it instantly. The form takes the guesswork out of the process, and I can focus on being creative!
Take Your Sewing Further With the Right Dress Form
Now that you know how to choose and use a dress form for fitting and draping, you’ll be able to take your sewing to a whole new level. Remember, the right dress form is an investment in your creativity. Whether you’re fitting custom designs or draping fabric for a new creation, your dress form is your partner in the process.
Take your time to find the form that works for you, and don’t be afraid to experiment with it. I promise, once you get comfortable with it, you’ll wonder how you ever managed without it!

Beginners Guide to Setting Up Your Sewing Machine

How to Sew a Drawstring Bag: Beginner Project

How to Sew a Shirred Garment with Elastic Thread

Sewing Smocked Garments: Techniques and Tips

How to Sew a Basic Fabric Coaster for Beginners

Sewing Tunic Tops and Dresses: Styles and Patterns

Sewing Pleated Garments: Techniques and Styles

How to Sew a Peplum Top or Dress

Sewing Formal Wear: Gowns, Tuxedos, and Suits

Sewing Basics for Men’s Clothing: Shirts, Pants, and Jackets

Sewing with Lace: Techniques for Clean and Elegant Finishes

How to Sew a Professional Waistband on Skirts and Pants

Sewing Winter Accessories: Hats, Gloves, and Scarves

Sewing with Sheer and Lightweight Fabrics

Sewing Sustainable Fashion: Upcycling and Repurposing Textiles

Sewing Vintage-Inspired Clothing: Patterns and Techniques

Sewing Costumes for Cosplay, Theater, and Special Events

Sewing Adaptive and Inclusive Clothing for Various Needs

Sewing Children’s Clothing: Patterns, Sizing, and Tips
